Introduction
Why Bread Crumbs Are Essential in Cooking
Bread crumbs are a versatile kitchen staple used in countless recipes worldwide. Whether you want to add a crispy coating to fried foods, enhance the texture of a dish, or bind ingredients together, bread crumbs play a crucial role in cooking. Types of Bread Crumbs vary from fresh to panko and seasoned, each offering unique textures and flavors for different dishes. They help create the golden crunch on crispy chicken, give structure to meatballs and meatloaf, and even serve as a flavorful topping for casseroles and pasta dishes. To maintain their freshness and usability, it’s essential to learn how to store Bread Crumbs properly.
Homemade bread crumbs are superior to store-bought versions because they are fresh, free from preservatives, and customizable. You can control the texture, seasonings, and ingredients, ensuring a healthier and more flavorful result.
Types of Bread Crumbs
Before diving into how to make bread crumbs, it’s essential to understand the different types available:
- Fresh BreadCrumbs – Soft and slightly moist, these are perfect for stuffing, binding ingredients, and making bread pudding.
- Dried BreadCrumbs – These are completely dehydrated, giving them a long shelf life and making them ideal for crispy coatings and crunchy toppings.
- Panko BreadCrumbs – A Japanese-style breadcrumb that is light, airy, and ultra-crispy, commonly used in tempura, fried foods, and oven-baked dishes.
- Seasoned BreadCrumbs – These come pre-flavored with herbs, garlic, cheese, and spices, adding instant flavor to recipes like breaded chicken or meatloaf.
What This Blog Post Will Cover
In this blog post, you’ll learn everything about making the best bread crumbs at home, including:
- Choosing the Right Bread for making different types of bread crumbs.
- Step-by-Step Instructions on drying and blending bread into fine crumbs.
- Seasoning and Storing Tips to maximize flavor and shelf life.
- Creative Ways to Use Bread Crumbs in cooking, from coatings to casseroles.
- Common Mistakes to Avoid, ensuring perfect breadcrumbs every time.
By the end of this guide, you’ll be able to create your own homemade bread crumbs that are fresher, tastier, and better suited for your favorite dishes. Let’s get started! 🚀
What Are Bread Crumbs and Why Use Homemade Ones?
Bread crumbs are small, crumbled pieces of bread that are widely used in cooking for coating, thickening, binding, and adding texture to dishes. They come in different forms, each with its own unique texture and purpose. While store-bought bread crumbs are convenient, homemade versions offer fresher taste, more versatility, and fewer preservatives. There are countless ways to use Bread Crumbs in cooking, from creating crispy coatings to enhancing the texture of various recipes.
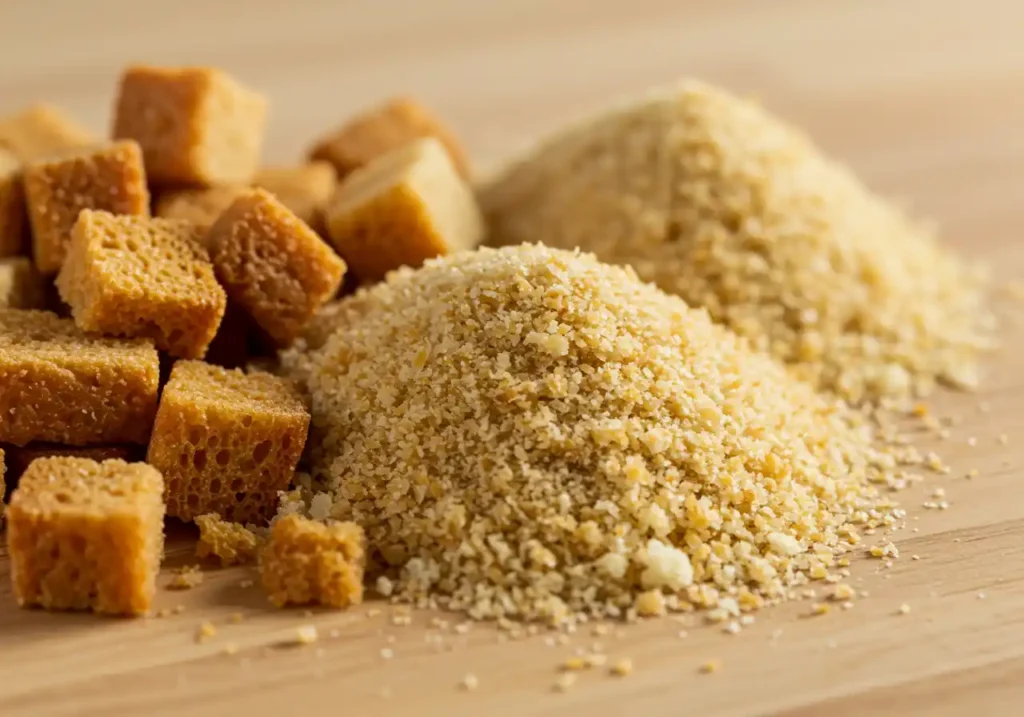
Types of Bread Crumbs
There are four main types of bread crumbs, each suited for different cooking applications:
1. Fresh Bread Crumbs
- Texture: Soft, moist, and slightly chewy.
- Best Uses: Stuffing, meatballs, meatloaf, and bread pudding.
- How to Make: Simply tear or pulse fresh bread in a food processor until you achieve the desired consistency.
Fresh breadcrumbs are perfect for recipes that need a softer texture rather than a crispy crunch. They blend easily into mixtures and help retain moisture in meat-based dishes.
2. Dried Bread Crumbs
- Texture: Finely ground, dry, and slightly coarse.
- Best Uses: Coating fried or baked foods, thickening soups, topping casseroles.
- How to Make: Bake slices of bread at a low temperature (250°F / 120°C) until dry, then crush or process into crumbs.
Dried breadcrumbs have a longer shelf life and create a crisp coating when used in frying or baking. They also absorb moisture in dishes, making them a great thickening agent in soups and stews.
3. Panko Bread Crumbs
- Texture: Light, airy, and extra crispy.
- Best Uses: Deep-frying, breading cutlets, adding crunch to baked dishes.
- How to Make: Made from crustless bread that is coarsely ground and dried.
Panko, a Japanese-style breadcrumb, is widely used in Asian cuisine and known for its super crispy texture. It doesn’t absorb as much oil as traditional breadcrumbs, making it a great option for healthier frying.
4. Seasoned Bread Crumbs
- Texture: Similar to dried breadcrumbs but with added flavor.
- Best Uses: Breaded chicken, crispy coatings, meatball mixtures.
- How to Make: Mix dried breadcrumbs with herbs, garlic powder, Parmesan cheese, salt, and black pepper.
Seasoned breadcrumbs add instant flavor to dishes, making them a convenient choice when you need a quick way to elevate your meals.
Why Make Your Own Bread Crumbs?
Many people wonder why they should go through the effort of making bread crumbs at home when they’re easily available in stores. Use Bread Crumbs in cooking to enhance flavors and textures while enjoying the benefits of homemade freshness. Here’s why homemade bread crumbs are superior to store-bought ones:
No Preservatives or Additives – Many packaged bread crumbs contain preservatives, artificial flavors, and added salt. Homemade crumbs are 100% natural.
Customizable Flavors – You can experiment with different seasonings, herbs, and spices to suit your taste. Want a spicy kick? Add chili flakes. Prefer an Italian flavor? Mix in oregano and Parmesan.
Cost-Effective & Reduces Waste – Instead of throwing away stale bread, you can repurpose it into breadcrumbs, saving money while reducing food waste.
Choice of Texture & Bread Type – Store-bought crumbs often have one-size-fits-all textures, but homemade versions allow you to control how fine or coarse they are.
Gluten-Free & Dietary-Friendly Options – Many commercial bread crumbs contain gluten, but with homemade crumbs, you can use gluten-free bread or specific types that fit your dietary needs.
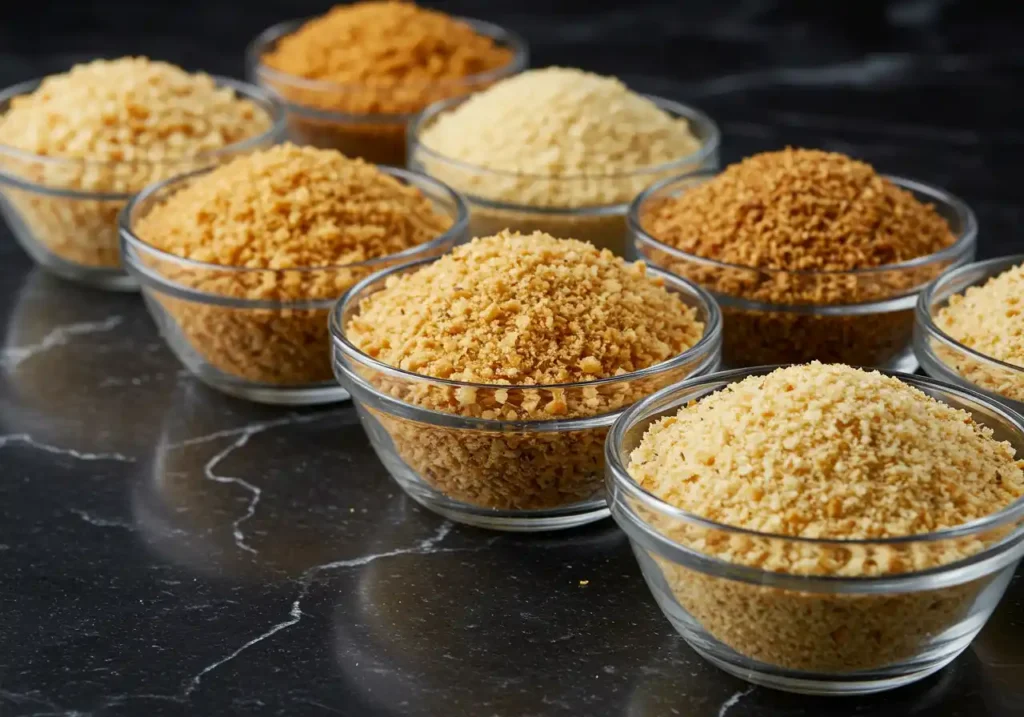
Best Bread for Making Bread Crumbs
Not all bread works equally well for making breadcrumbs. Here are some of the best options:
- White Bread – Produces classic, neutral-flavored breadcrumbs perfect for coatings and thickening.
- Whole Wheat Bread – Adds a slightly nutty flavor and is a healthier alternative.
- Sourdough Bread – Creates tangy, flavorful breadcrumbs that work great in stuffing and savory dishes.
- Baguette or Artisan Bread – Makes rustic, coarse crumbs ideal for crispy toppings.
- Gluten-Free Bread – Allows people with gluten intolerance to enjoy homemade breadcrumbs without worry.
Pro Tip: Avoid using overly soft or sweet breads (like brioche or sandwich rolls) unless you want a sweeter taste in your bread crumbs.
By choosing the right type of bread and making your own bread crumbs, you can enhance your dishes with fresher flavors, better textures, and healthier ingredients. Now that you know why homemade bread crumbs are worth it, let’s move on to the step-by-step process of making them at home!
How to Make the Best Bread Crumbs at Home
Making homemade bread crumbs is easier than you might think, and the result is fresher, more flavorful, and healthier than store-bought versions. Whether you’re looking for soft, fine, crispy, or seasoned bread crumbs, this step-by-step guide will help you create the perfect batch for your cooking needs. You’ll also discover various ways to use Bread Crumbs in cooking, elevating your dishes with the perfect texture and flavor.
Step 1: Choose the Right Bread
The type of bread you use has a big impact on the texture and flavor of your bread crumbs. Here’s how different bread choices affect the final product:
Soft vs. Crusty Bread
- Soft Bread (like sandwich bread recipe) creates finer, more uniform crumbs, perfect for binding meatballs or meatloaf.
- Crusty Bread (like sourdough or baguettes) makes coarser crumbs that add extra crunch to baked dishes.
Gluten-Free Bread
- If you’re gluten-sensitive or prefer a wheat-free option, using gluten-free bread will ensure you can still enjoy homemade bread crumbs in your recipes.
Flavored or Whole-Grain Bread
- Whole wheat or multigrain bread adds a nutty, hearty flavor to bread crumbs.
- Bread with herbs, cheese, or seeds naturally adds extra taste.
💡 Pro Tip: Stale bread works best! If your bread is fresh, let it sit out for a few hours before using it to make crumbs.
Step 2: How to Dry Bread for Bread Crumbs
Before you turn your bread into crumbs, you need to dry it out to remove moisture. There are several methods to do this:
1. Oven-Baked Method (Quickest Way) 🔥
- Preheat your oven to 250°F (120°C).
- Slice or tear the bread into small pieces.
- Arrange the pieces in a single layer on a baking sheet.
- Bake for 15–20 minutes, flipping halfway, until the bread is completely dry and crisp.
- Let the bread cool before crushing or blending.
Best For: Those who need bread crumbs quickly and want even, crispy results.
2. Air-Drying Method (No Oven Needed) 🌬️
- Place slices of bread on a wire rack in a cool, dry place.
- Let them sit out overnight or for 24 hours until fully dried.
Best For: Those who prefer a no-heat method and have time to wait.
3. Toaster Method (Small Batches) 🍞
- Toast the bread slices on a medium setting until golden brown.
- Let them cool completely before turning them into crumbs.
Best For: Those making a small amount of breadcrumbs quickly.
💡 Pro Tip: The bread should be completely dry before processing; if it feels soft or spongy, it needs more time!
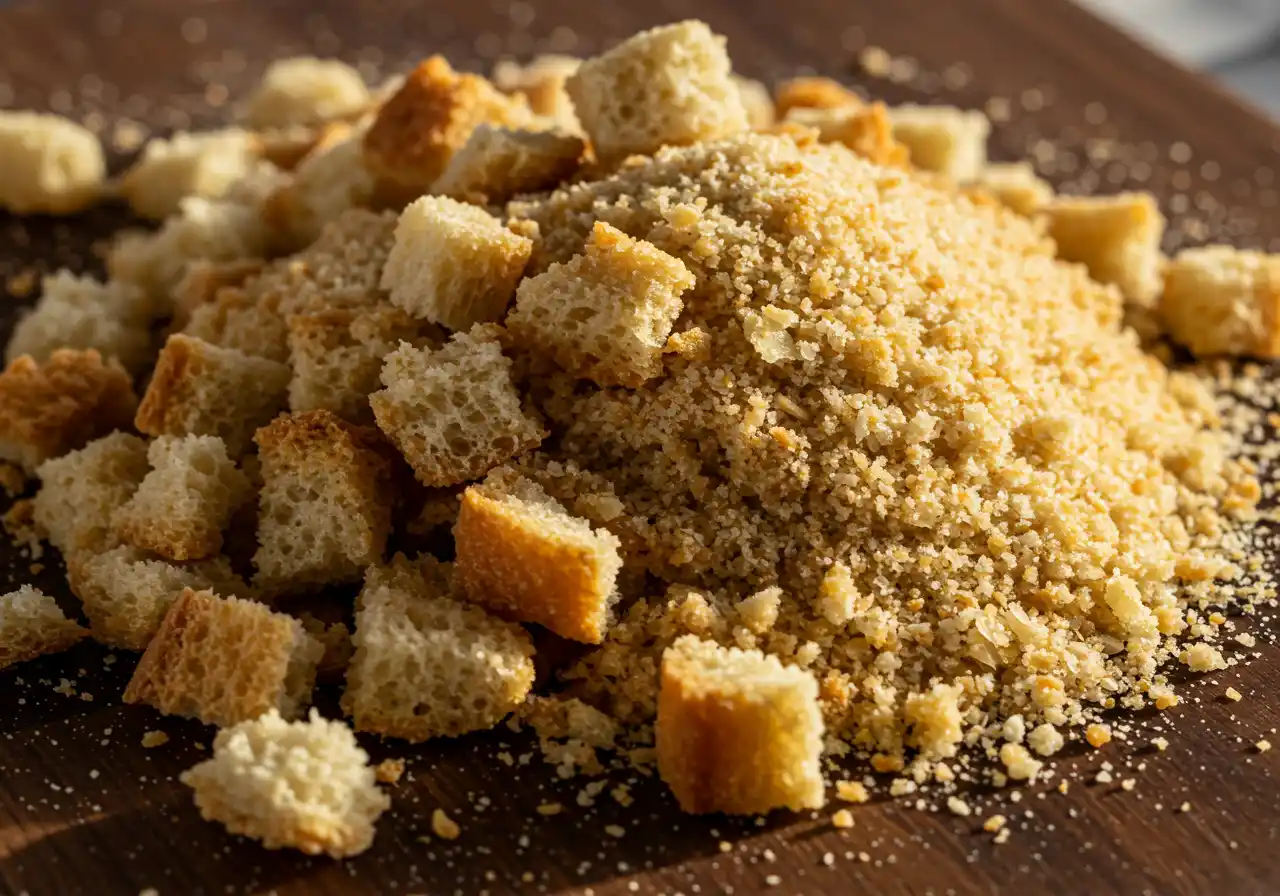
Step 3: How to Blend or Crush Bread into Crumbs
Once your bread is dry, it’s time to turn it into fine or coarsecrumbs. You can use several methods, depending on the texture you need:
1. Food Processor Method (Best for Fine Crumbs) 🌀
- Break the dried bread into smaller chunks.
- Place them in a food processor and pulse until the desired consistency is reached.
Best For: Making fine, even-textured crumbs quickly.
2. Box Grater Method (Handy Alternative) 🧀
- Hold the dried bread firmly and rub it against a cheese grater.
Best For: A manual method when you don’t have a food processor.
3. Rolling Pin Method (Rustic & Coarse Crumbs) 🏏
- Place the dried bread in a ziplock bag.
- Use a rolling pin or mallet to crush the bread into crumbs.
Best For: Making chunky, rustic-style crumbs for crunchy toppings.
💡 Pro Tip: Sift the bread crumbs after crushing to separate finer and coarser pieces!
Step 4: How to Season Bread Crumbs for Extra Flavor
If you want instant flavor, seasoning your bread crumbs is a game-changer! Here are some popular seasoning ideas:
1. Italian-Style Bread Crumbs 🇮🇹
- 1 teaspoon dried oregano
- 1 teaspoon dried basil
- 1 teaspoon garlic powder
- ½ teaspoon salt & black pepper
Perfect For: Pasta dishes, meatballs, and breaded chicken.
2. Garlic & Parmesan Bread Crumbs 🧄🧀
- 1 teaspoon garlic powder
- 2 tablespoons grated Parmesan cheese
- ½ teaspoon paprika
- ½ teaspoon salt
Perfect For: Topping baked mac & cheese, casseroles, and vegetables.
3. Spicy Bread Crumbs 🌶️
- ½ teaspoon cayenne pepper
- ½ teaspoon chili flakes
- 1 teaspoon smoked paprika
- ½ teaspoon salt
Perfect For: Fried chicken, shrimp, or spicy breaded snacks.
4. Herb-Infused Bread Crumbs 🌿
- 1 teaspoon dried thyme
- 1 teaspoon rosemary
- ½ teaspoon garlic powder
- 1 teaspoon onion powder
Perfect For: Roasted veggies, stuffing, and seafood.
💡 Pro Tip: Store seasoned bread crumbs in an airtight container for up to 1 month for the best flavor.
Final Thoughts
Making homemade bread crumbs is easy, cost-effective, and far more flavorful than store-bought options. By following these steps, you can create the perfect crumbs for any dish—whether it’s a crispy coating, a binder for meatballs, or a crunchy topping for casseroles.
Now that you’ve mastered how to make the best bread crumbs at home, it’s time to put them to use in your favorite recipes! Stay tuned for creative ways to cook with bread crumbs in the next section.
How to Store Bread Crumbs for Maximum Freshness
Once you’ve made a batch of homemade breadcrumbs, proper storage is key to maintaining their texture, flavor, and shelf life. Whether you’re storing them for a few days or several months, following the right techniques will prevent spoilage and keep them fresh for whenever you need them.
Short-Term Storage: Keeping in an Airtight Container
If you plan to use your breadcrumbs within a week or two, storing them at room temperature is a convenient option. Here’s how to do it right:
1. Choose the Right Container
- Use an airtight container (glass jars, plastic containers, or resealable bags) to keep air and moisture out.
- Vacuum-sealed bags work best for long-lasting freshness.
2. Store in a Cool, Dry Place
- Keep the container in a pantry or cupboard away from heat and humidity.
- Avoid storing them near the stove, dishwasher, or any moisture-prone areas.
3. Label and Date Your Bread Crumbs
- Use a marker or label to note the storage date.
- Properly stored, dry bread crumbs last up to 2 weeks at room temperature.
💡 Pro Tip: If your breadcrumbs start to smell stale, toast them in a dry pan for a few minutes to refresh their flavor!
Freezing Bread Crumbs: How Long They Last and Best Practices
For long-term storage, freezing is the best way to keep homemade breadcrumbs fresh for months without losing quality.
1. How to Freeze Bread Crumbs Properly
- Spread the breadcrumbs on a baking sheet and let them cool completely.
- Transfer them to a freezer-safe bag or an airtight container.
- Remove excess air from the bag before sealing to prevent freezer burn.
2. Label and Date the Bag
- Write the storage date on the bag/container to track freshness.
- Properly frozen, breadcrumbs can last up to 6 months without losing quality.
3. How to Use Frozen Bread Crumbs
- No need to thaw! Use them directly from the freezer in recipes.
- If they feel slightly moist after thawing, toast them in a dry pan or bake at 300°F (150°C) for 5 minutes to crisp them up again.
💡 Pro Tip: Store seasoned and plain breadcrumbs separately in the freezer. This way, you can season fresh crumbs differently as needed!
Preventing Moisture and Mold: Tips for Keeping Them Dry
One of the biggest risks when storing breadcrumbs is moisture buildup, which can lead to mold and spoilage. Here’s how to prevent it:
1. Store Bread Crumbs in Small Portions
- Divide your breadcrumbs into smaller batches before storing them.
- This way, you only take out what you need without exposing the whole batch to air.
2. Add a Moisture Absorber
- Place a silica gel packet or a few uncooked rice grains in the storage container to absorb excess moisture.
- If using rice, make sure it’s in a small mesh bag or cheesecloth so it doesn’t mix with the crumbs.
3. Avoid Storing Warm or Freshly-Made Bread Crumbs
- Let bread crumbs cool completely before sealing them in a container.
- Trapping even a little warmth can create condensation, leading to mold growth.
💡 Pro Tip: If your breadcrumbs become slightly soggy, spread them on a baking sheet and bake at 250°F (120°C) for 10 minutes to dry them out again.
Final Thoughts
Storing homemade breadcrumbs properly ensures they remain fresh, crunchy, and flavorful for future use.
- For short-term storage, keep them in an airtight container at room temperature for up to 2 weeks.
- For long-term storage, freeze them in airtight bags for up to 6 months.
- Prevent moisture buildup by keeping them cool, dry, and stored in small batches.
By following these tips, you’ll always have crispy, homemade breadcrumbs ready to enhance your favorite dishes! 😊🍞✨
Best Ways to Use Bread Crumbs in Your Favorite Dishes
Breadcrumbs are a versatile ingredient that can elevate the texture and flavor of many dishes. Whether you’re looking to add a crispy coating to your favorite fried foods or need a binding agent for a hearty meal, breadcrumbs are the perfect addition. Below are some of the best ways to incorporate homemade breadcrumbs into your cooking.
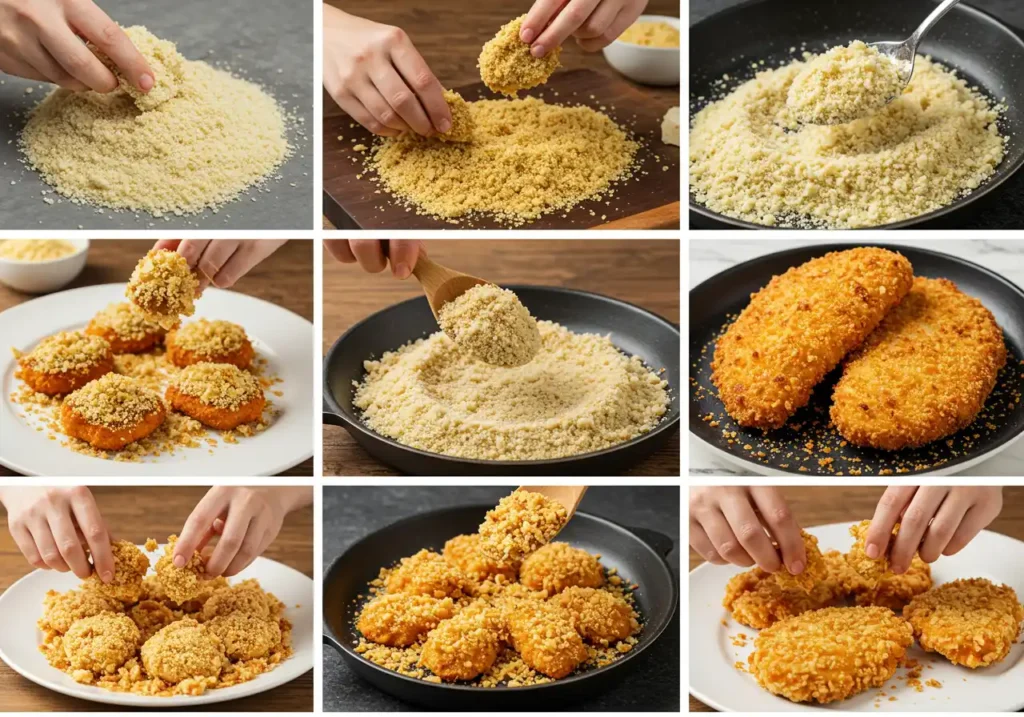
Crispy Coating for Fried Foods (Chicken, Fish, Veggies)
One of the most popular uses for breadcrumbs is as a crispy coating for fried foods. The right breadcrumbs create a golden, crunchy texture that adds satisfying crispiness without overpowering the flavor of the dish. Here’s how to use them in various fried foods:
1. Fried Chicken and Fish
- Use breadcrumbs as the outer coating for fried chicken or fish fillets.
- For an extra crunch, coat your protein in egg wash before dredging it in breadcrumbs.
- Panko breadcrumbs are especially great for these dishes because of their larger, flakier texture, providing an airy, crispy finish.
2. Fried Veggies
- Coat vegetables like zucchini, cauliflower, or eggplant in breadcrumbs for a crispy texture.
- Add a sprinkle of Parmesan cheese and Italian seasoning to your breadcrumbs for an added layer of flavor.
Pro Tip: Double-coat for extra crunch by dipping the item back into the egg wash and breadcrumbs after the first coat. This method creates an even thicker, crispier crust.
Binding Agent in Recipes (Meatballs, Meatloaf, Veggie Patties)
Breadcrumbs are not just for coating and topping – they’re also a fantastic binding agent that helps hold ingredients together in various dishes. Whether you’re making meatballs, meatloaf, or veggie patties, breadcrumbs can help maintain the structure of your dish without adding heaviness. Here’s how to use them:
1. Meatballs and Meatloaf
- Incorporate breadcrumbs into meatballs or meatloaf recipes to keep the mixture from becoming too dense.
- The crumbs absorb moisture and create a lighter, more tender texture.
- Use fresh breadcrumbs if you want to avoid excess dryness in the final dish, or dried crumbs if you’re aiming for a firmer texture.
2. Veggie Patties
- In veggie patties (like lentil or black bean burgers), bread crumbs help bind the vegetables and other ingredients together.
- Gluten-free bread crumbs are perfect for those on a gluten-free diet, helping create the same structure as traditional bread crumbs.
Topping for Casseroles and Mac & Cheese (Adds Crunch and Flavor)
Breadcrumbs are an excellent addition as a topping for casseroles, mac & cheese, and other baked dishes, providing a satisfying crunch and a burst of flavor. The crispy topping contrasts beautifully with the creamy, savory filling beneath.
1. Casseroles
- Sprinkle breadcrumbs over the top of a casserole for a crunchy finish.
- Mix the crumbs with melted butter or olive oil to enhance the flavor and create a golden, crispy layer.
- You can even add a bit of cheese (like Parmesan) or herbs to the breadcrumbs for added richness.
2. Mac & Cheese
- For a crispy, golden topping on mac & cheese, scatter breadcrumbs over the dish and bake it until it’s bubbling and crispy.
- Add a sprinkle of garlic powder or paprika to the breadcrumbs to give the topping extra flavor.
Pro Tip: For added flavor, try using seasoned bread crumbs or mix your breadcrumbs with grated cheese before sprinkling them over casseroles.
Thickening Soups and Sauces (A Secret Chef Hack)
Breadcrumbs can also be used as a secret thickening agent in soups, stews, and sauces. This method is a great way to use up leftover breadcrumbs while creating a silky, thick texture without relying on flour or cornstarch. Here’s how:
1. In Soups and Stews
- Add breadcrumbs to soups or stews to create a velvety, creamy consistency.
- As the crumbs absorb the liquid, they will naturally thicken the broth, making it feel richer and heartier.
- Stir the bread crumbs into the soup while it’s simmering, then let it cook for a few minutes for best results.
2. In Sauces
- When making a tomato-based sauce or gravy, breadcrumbs can be used to add thickness and volume.
- They will blend seamlessly into the sauce, creating a creamy, smooth texture without altering the flavor.
Pro Tip: When using bread crumbs to thicken, blend them well to avoid clumps. You can always use a food processor to break them down into a finer texture for smoother results.
Final Thoughts
Breadcrumbs are a versatile, affordable, and easy-to-use ingredient that can enhance a variety of dishes. From crispy coatings to binding agents, toppings for casseroles, and even a thickening agent for soups and sauces, breadcrumbs arean essential pantry staple that should not be underestimated. Whether you’re using fresh, dried, or Panko bread crumbs, there’s no shortage of ways to enjoy their delicious crunch and flavor in your cooking.
Common Mistakes to Avoid When Making Bread Crumbs

Making breadcrumbs at home is an easy and cost-effective way to use up leftover bread, but there are a few common mistakes that can hinder your results. By avoiding these errors, you’ll ensure your breadcrumbs turn out perfect every time, whether you’re using them for coatings, toppings, or as a binder in recipes. Here’s a breakdown of the most common mistakes to watch out for:
Using the Wrong Bread (Why Some Types Don’t Work Well)
The type of bread you choose can have a significant impact on the texture and flavor of your breadcrumbs. While most breads work well, not all types are ideal for every purpose. Here’s what to keep in mind when selecting the right bread:
1. Soft or Moist Breads (Like Sandwich Bread)
- Mistake: Using overly soft, moist bread (like a homemade sandwich bread recipes) can result in soggy breadcrumbs.
- Why It Happens: Soft, moist breads often don’t dry out as evenly or effectively as denser breads. The crumbs may stick together or become mushy when used.
- Solution: Opt for slightly stale or dried-out bread for the best results. Artisan-style loaves or whole wheat bread are better for creating dry crumbs. You can even leave bread slices out for a few hours or toast them lightly before making crumbs.
2. Flavored or Sweet Breads
- Mistake: Using bread with too many flavors (like raisin bread or sweet breads).
- Why It Happens: The sweetness or strong flavors of these types of bread may not work well for savory dishes, resulting in a mismatch of flavors.
- Solution: Stick with neutral or lightly flavored bread like white bread, sourdough, or whole wheat for a versatile crumb base that can work in a variety of dishes.
3. Gluten-Free Bread
- Mistake: Not properly preparing gluten-free bread to make it crispy.
- Why It Happens: Gluten-free bread can be more moist and crumbly, leading to breadcrumbs that are difficult to work with if not dried properly.
- Solution: Toast gluten-free bread for a longer time and make sure it is completely dry before blending into crumbs. You can also increase the texture by blending the crumbs in smaller batches.
Not Drying Bread Properly (Avoiding Mold and Sogginess)
Properly drying your bread is crucial when making breadcrumbs. If bread isn’t dried thoroughly, it can lead to mold, sogginess, or ineffective crumbs that won’t hold together when used in dishes.
1. Overlooking Drying Methods
- Mistake: Skipping the drying process or only slightly drying the bread before making crumbs.
- Why It Happens: Many assume that they can simply break up fresh bread into crumbs and dry it as they go.
- Solution: The best way to dry bread is to slice it and bake it in a low oven (around 250°F/120°C) for 15-30 minutes. This will remove moisture, leaving the bread crisp and easy to process. Alternatively, you can air-dry the bread for a few hours or leave it out overnight to dry out naturally.
2. Not Drying the Crumbs Enough
- Mistake: Not allowing the breadcrumbs to dry completely before storage.
- Why It Happens: If breadcrumbs aren’t dried completely, they can develop mold or spoil quickly when stored.
- Solution: After processing your bread into crumbs, spread them out on a baking sheet and place them back in the oven for an additional 5-10 minutes to make sure the crumbs are fully dry. When storing them, keep them in an airtight container to avoid moisture from the environment.
Over-Seasoning or Under-Seasoning (Finding the Right Balance)
Seasoning is essential when making breadcrumbs because it determines how well they’ll enhance the flavor of the dishes they’re used in. However, it’s easy to either over-season or under-season them, which can lead to bland or overly salty crumbs.
1. Over-Seasoning
- Mistake: Adding too many spices or too much salt to your breadcrumbs.
- Why It Happens: When seasoning breadcrumbs, it’s tempting to throw in a bunch of seasonings to make them flavorful.
- Solution: Start with a small amount of seasoning, such as garlic powder, dried herbs (like thyme or rosemary), and salt. You can always adjust the seasoning to taste as you use the bread crumbs in different dishes. Parmesan cheese is also a great addition for a savory twist.
2. Under-Seasoning
- Mistake: Not seasoning your breadcrumbs enough, leaving them bland.
- Why It Happens: Breadcrumbs often get overlooked in terms of seasoning, especially if you’re focused on the main dish.
- Solution: Even if you’re using the breadcrumbs in a savory dish like meatballs or casseroles, make sure they are seasoned sufficiently. The right balance of salt, pepper, and herbs can bring out their natural flavors and complement the other ingredients.
Storing Incorrectly (Avoiding Moisture and Spoilage)
If you don’t store your breadcrumbs properly, they can become stale, moldy, or lose their texture. Moisture is the biggest enemy of breadcrumbs, so it’s essential to keep them in the right environment for long-lasting freshness.
1. Storing in Non-Airtight Containers
- Mistake: Using containers that aren’t sealed tightly.
- Why It Happens: If you don’t use an airtight container, moisture from the air can seep in and cause your bread crumbs to become soggy or spoil quickly.
- Solution: Always store bread crumbs in an airtight container made of glass or plastic. For longer shelf life, freeze the crumbs in a sealed bag or container.
2. Not Freezing for Long-Term Storage
- Mistake: Keeping bread crumbs out at room temperature for too long.
- Why It Happens: Many people forget that breadcrumbs have a shelf life, and once they’re made, they can start to lose their flavor and texture after a few days if not stored properly.
- Solution: Freeze breadcrumbs if you plan to store them for more than a week. This helps maintain their freshness and prevents mold from forming. Just make sure to let the breadcrumbs cool completely before freezing them to avoid condensation inside the container.
3. Storing Bread Crumbs with Too Much Moisture
- Mistake: Storing breadcrumbs that still have some residual moisture.
- Why It Happens: If the bread crumbs weren’t completely dry before storage, moisture can cause them to clump together or develop mold.
- Solution: Before storing, ensure the crumbs are completely dry and free from any residual moisture. You can leave them out for a little longer, or bake them again to ensure they are fully dry.
Final Thoughts
By avoiding these common mistakes when making breadcrumbs, you can ensure that your homemade crumbs are always fresh, flavorful, and ready to elevate any dish. Choose the right bread, dry it properly, season it to perfection, and store it correctly, and you’ll have the perfect batch of bread crumbs every time. Now you’re ready to use Bread Crumbs in cooking and enhance your meals with delicious, homemade freshness. Happy cooking!
Conclusion
Making breadcrumbs at home is not only a simple and cost-effective way to reduce food waste, but it also offers a multitude of benefits that store-bought versions can’t match. Types of Bread Crumbs vary, including fresh, dried, panko, and seasoned options, each suited for different recipes. From customizing flavors to ensuring you have fresh, preservative-free ingredients, homemade breadcrumbs allow you to control every aspect of your cooking. No matter which type you choose, there are countless ways to use Bread Crumbs in cooking, from adding a crispy coating to dishes to acting as a binding agent in recipes.
Recap the Benefits of Homemade Bread Crumbs
- Freshness: Homemade breadcrumbs offer superior freshness, with no preservatives or artificial ingredients, ensuring your meals are as healthy as they are delicious.
- Customization: Making your own breadcrumbs means you can experiment with different breads (like sourdough, whole wheat, or gluten-free options) and seasonings (from garlic powder to Parmesan cheese). You can create unique blends that complement your dishes perfectly.
- Cost-Effective: Instead of buying multiple packages of breadcrumbs, you can use up leftover bread that might otherwise go to waste. This method is both economical and eco-friendly, making it a win-win for your kitchen.
- Versatility: Homemade breadcrumbs are incredibly versatile, whether you’re using them to coat fried foods, bind meatballs, add a crunchy topping to casseroles, or thicken sauces. You have endless ways to incorporate them into your favorite recipes.
Encourage Readers to Experiment with Different Types and Flavors
Now that you know how to make breadcrumbs, don’t be afraid to get creative! Try experimenting with different types of bread, such as rye or gluten-free varieties, to give your crumbs a unique twist. You can even get adventurous with the seasonings, adding herbs like oregano, rosemary, or basil for an extra burst of flavor. Why not try incorporating some cheese or spices like paprika or cumin to complement specific dishes like meatloaf or fried chicken?
You might also want to experiment with crusting meats, roasting veggies, or adding breadcrumbs to stuffings. The more you play around with types of Bread Crumbs, the more ways you’ll discover to use Bread Crumbs in cooking and enhance your dishes with texture and flavor.
We’d love to hear about your journey making breadcrumbs at home! Give it a try the next time you find yourself with leftover bread or when you want to bring your cooking to the next level. Share your experiences with us—what types of bread crumbs and seasonings did you use? Did you find new ways to incorporate your breadcrumbs into your favorite dishes?
Feel free to leave a comment below or share your photos and feedback on social media. We’re excited to see how you make the most of your homemade breadcrumbs—so grab a loaf, get baking, and let your creativity run wild! Happy cooking!
Explore More Delicious Recipes for Every Occasion!
If you enjoyed learning how to make the best breadcrumbs at home, why stop there? The kitchen is full of endless possibilities when it comes to delicious, homemade creations. Whether you’re looking for savory dishes, sweet treats, or unique ways to spice up your meals, we’ve got a variety of recipes to inspire your next cooking adventure. From crispy fried chicken to decadent mac and cheese and mouthwatering desserts, there’s a recipe waiting for every craving.
Don’t miss out on these flavorful, easy-to-make dishes—scroll down to discover more mouthwatering ideas and get ready to take your cooking to new heights!
- 10 Must-Try Italian Cooking Recipes Loved by Chefs
- Mexican Cooking Recipes for Beginners: Simple Steps to Bold Flavors

- Easy Carnivore Diet Recipes with 5 Ingredients or Less
- Top 15 Carnivore Diet Recipes That Actually Taste Amazing
- 15 Delicious Cuisinart Ice Cream Maker Recipes You Need to Try

- Top 5 Sugar Free Ice Cream Flavors You’ll Love

- Copycat Chick-fil-A Waffle Fries Recipe – Step-by-Step Perfection

- How to Make the Best Bread Crumbs for Your Favorite Dishes

- How to Make the Perfect Ice Cream Cone : Tips, Tricks & Delicious Recipes

- Bluey Cake Tutorial: How to Create the Perfect Themed Cake for Kids’ Parties

- Swordfish Steak Recipe: How to Get It Perfect Every Time
- Princess Cake Recipe: How to Make the Perfect Swedish Prinsesstårta
- Nanalan Cake Recipe: How to Make This Adorable and Nostalgic Treat

- DIY Minecraft Cake: How to Make the Perfect Pixelated Treat

- Authentic Terra Massoud Recipe: A Step-by-Step Guide to Perfection

- How to Make Chocolate Gravy from Scratch Quick and Easy Guide

- How to Make the Perfect Tini Mac and Cheese – Step-by-Step Guide
- Taste of Home Recipes: 25 Comforting Dishes That Feel Like a Warm Hug
- Easy Ways to Customize Your Madeleine using cream cake
- How to Make Gordon Ramsay’s Chocolate Cream Cheese Pound Cake
- Green Pumpkin Cooking Guide: 10+ Asian Recipes for Savory Delights